How to install a cornice
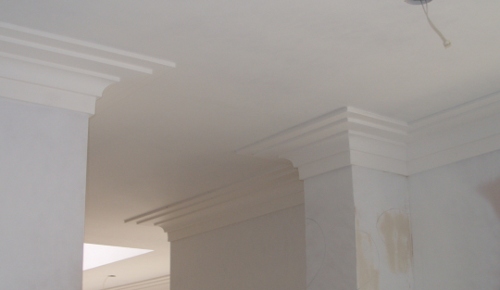
Positioning and fixing the cornice
Step 1 - First ensure the surface you will be fixing the cornice to is clean, dry and flat. Repair the surface where necessary.
Step 2 - Make a template by cutting a short length of cornice roughly 150 mm long. Starting at a corner of the room push the cornice template into the angle between ceiling and wall. Use a pencil to mark both the depth and projection on the wall and ceiling whilst allowing for 3 mm of adhesive. Do this on both sides of the corner.
Step 3 - Repeat step 2 on all corners of the room including alcoves and chimneybreasts. Now join up all the lines along each wall so that you have continuous lines around the room.
Step 4 - To fix cornices always use the recommended adhesive. For better fixing we recommend you nail or screw the cornice to the wall or ceiling joist. When using nails or screws ensure they are inserted into a smooth part of the cornice to make it easier to fill later.
Step 5 - After considering the cornice pattern repeat decide which point is the best starting place.
Step 6 - Cut the first piece of cornice and mitre the ends. See guide to cutting a mitre below). Now spread the adhesive evenly across the back of the cornice that will be against the wall or ceiling, squeeze the cornice in place to ensure a tight fit. Hammer the nails or screw the screws half way through do not knock them in the whole way. If you find the wall is slightly off line fix the cornice exactly to your guidelines. Leave approx 6mm between the mitred ends at the corners so they can be joined using the correct jointing compound. Once you have finished fixing the cornices to either side of the corners carry on around the whole room. When fixing two straight pieces leave 6mm at the joint and fill in using the correct jointing compound. Once all the joints are aligned hammer the nails or screw the screws below the surface of the cornice and fill in the holes.
Cutting a mitre
Determine the projection of the cornice by measuring from the wall to the line marked on the ceiling. Transfer this mark to the relevant end of the cornice. If cutting an internal mitre put this mark on the top end if it is a external mitre put the mark on the bottom of the cornice. Now position the cornice upside down i.e the workbench is the ceiling. Cut through the cornice using a wood saw in line with the markings. Repeat this method on the adjacent wall.
Filling joints and mitres
Mix a small quantity of plaster in water until you have a milk consistency. Cut a square piece of scrim cloth (hessian) at the same width of the cornice and soak in the mixture. Wipe any excess mixture and using a filling knife or other appropriate tool, push the scrim into the joint. Ensure the scrim is behind of the surface of the cornice and fill the joint with a semi dry plaster mix. Clean away any excess plaster mix. As the jointing plaster begins to set carve it away to create an clean invisible joint.
Finally fill in the gaps where the cornice meets the wall and ceiling. Brush away any loose material, when dry the cornice is ready to be painted.
Need help or would like your cornice professionally fitted?
We offer a comprehensive fitting service on all of our products. Our skilled team of technicians can provide you with a free quotation or some general advice if required. Many of our customer choose our supply and fit service as our technicians carry out all work at very high standards, we are well know throughout the plaster moulding industry for providing excellent quality of work whilst providing a very good customer experience.
Request a no obligation quote